Styling Your Second Title
Secondary Title allows you to use HTML both in the Title Format as well as in input fields on individual alternative titles. This gives you close to total control, how or even if the secondary title should be displayed.
Method #1: Global Style via Title Format
(This method is not recommended)
If you'd like the secondary title to look the same regardless of what page the user sees, the easiest way to achieve this is the Title Format input field on the Settings page. An example of HTML inside the Title Format:
Example:

As explained on the Settings page, any title of a post, page, or custom post type will be displayed according to this format where the placeholders %secondary_title% and %title% act as placeholders for each post's secondary and primary title, respectively.
For example, use tags such as <div>...</div> to style the secondary title and the main title separately. Use the HTML attribute style="..." inside the <div> to add your CSS-compatible style.
TIP
Most HTML tags, including <div> and <h2>, will create a line break after. If this is not intended, use <span>.
The HTML entered in the Title Format field above in full:
<h3 style="font-size:20px;color:red;margin-bottom:8px;">%secondary_title%</h3><h2>%title%</h2>The result of a post using these adjustments will look like this:

The CSS style set inline
WARNING
When entering the style into the Title Format input, it will affect all titles on every section of your website, including widgets, single post pages, etc. Consider using Method #2.
Method #2: Styling using class="..."
Instead of applying one style for your entire site, a more flexible and maintainable way to change the style of the title output is by adding classes to the tags surrounding the placeholders and using WordPress' native Customizer. This feature allows you to enter custom CSS and use it to style tags with a specific class. This way, you can narrowly define the style based on the current page or even specific location.
Remove style Attribute
All you have to do is remove the style="..." attribute and add a class with a distinctive name instead, such as secondary-title and title. In the Title Format, this will look like this:
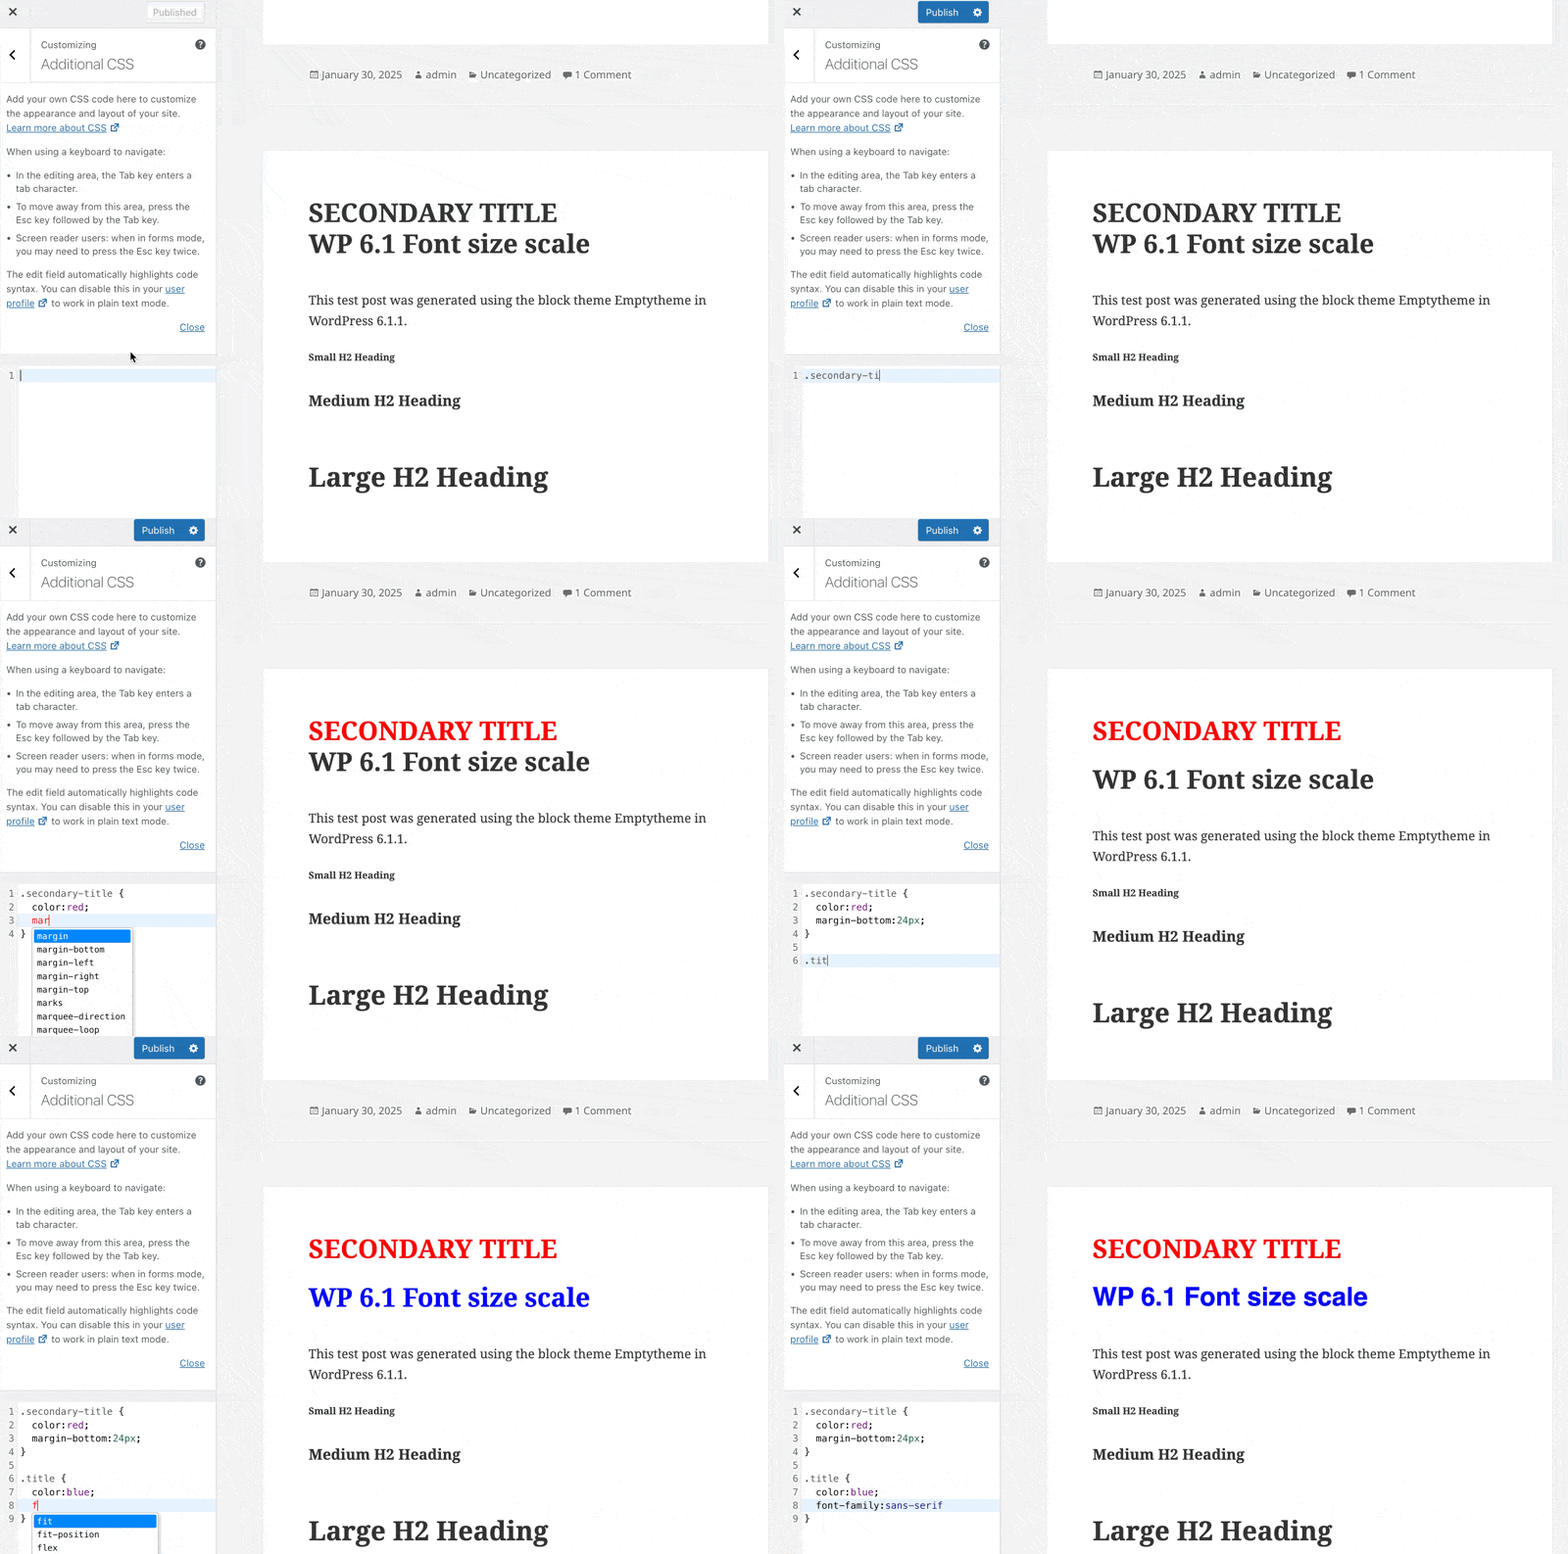
<h3 class="secondary-title">%secondary_title%</h3><h2 class="title">%title%</h2>In the Customizer, which is easily accessible on the Dashboard under "Appearance" -> "Customize," open the "Additional CSS" panel and use this space to write your CSS code.
If you're using the Title Format code from the example above, you can now easily use simple CSS to target the secondary title (.secondary-title) and the primary title (.title) and adjust its styles as seen in this clip:

Excursion
CAUTION
If only the set class names are adjusted, it will still affect all tags with this class on your entire website.